Camping Goddess Pancake Recipe

IMG_20140825_085130

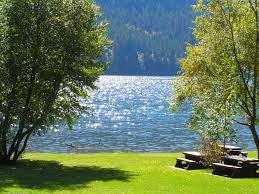
It’s early morning at the campground…the sun is filtering through the trees…you whip up some deliciously fluffy pancakes, from scratch. Crack open a bottle of maple syrup, throw on some blueberries and Voila! You Are a Camping Goddess!

Recipe: (Feeds 4 – approx 12 x 4″ fluffy pancakes)

At home:

Measure out the following dry ingredients into a sandwich size zip lock bag:

  • 1 1/2 Cups Flour (I use unbleached, enriched white flour)
  • 1 tbsp Sugar (this is entirely optional though)
  • 1 tbsp Baking Powder
  • Pinch of salt

The dry mix will keep perfectly until you’re ready to use it (For a week trip, I take a couple of half portions in a medium freezer zip lock bag)

At your camp site:

Put dry ingredients into a bowl (I use a stainless steel one that also serves as a salad bowl, chip bowl etc but I’ve also used one of those take-along plastic containers and also a saucepan!) then add the wet:

  • 2 large eggs (I fully recommend buying one of these yellow plastic egg containers for your cooler – it prevents breakages and you can buy them either at your local camping supplies store or dollar store in the summer months)IMG_20140815_171338
  • 1 1/2 cups of milk
  • 1/4 cup of oil (I use canola but you can also use Olive or vegetable – depends on taste and what you have to hand)
  • note: You can always pre-measure the milk, oil and eggs at home and put them in a leakproof container so that you don’t have to measure them while camping. Mixing the whole thing together at home works as well but it needs a good shake when you’re ready to cook it. I have found that it’s easier to leave it dry until ready to eat simply because of the space it saves in the cooler and over a multi night trip.

Mix up the batter until all the flour is incorporated, don’t beat it (it turns the starch gloupy apparently)

Heat your pan and pour out your pancakes into whatever sizes you like – flip ’em and serve ’em (preferably with maple syrup but my kids also like nutella! I love mine with heated up blueberries – bit of a camping luxury there but if you’ve got them, just heat them up in a small pan until the juice starts to bubble – take them off the heat – cook your pancakes and spoon on the purple goodness! Delicious!

IMG_20140825_085140IMG_20140822_141415

4 Basic Camping supplies that will make your life easier

Having worked in the outdoor industry for many years, I’ve naturally acquired a few camping gadget gems but there are other, far more basic items, that are just as important in making my life easier when camping! Here’s a quick list of 4 easy to get-your-hands-on supplies that you’ll always be glad you have!

1.    Stainless Steel cooler

We put getting one of these off for years…kicking ourselves now of course! They might cost more than the regular plastic ones you see at the big box stores, but when you get one you’ll quickly realise that it was money well spent (precisely when you’re still drinking ice cold beer on day 3 of your summer camping trip!)  I recommend buying a block of ice (they cost the same as the cubes and are usually kept in the same place at the store) as it says frozen longer and however high the temperature outside soars ( we were just away for a week in 30c weather) you’ll still have ice in there after 3 days (albeit a lesser block!) The explanation is really simple – stainless steel reflects more of the heat and keeps the cold in. Thanks to the locking mechanism on the lid, it stays well sealed and keeps your food, and beer, nice and chilled! (also acts as a step / seat / table thanks to it’s level and sturdy base!)

377

Cooler handily located by the door which makes it a useful perch for the kids!


2.    Baby Wipes

It’s a known fact that baby wipes remove 99% of all dirt (the fact that this is slightly worrying, does not deter me from vigorously scrubbing away with one at anything I think might stain – children’s faces included) They are usually on sale, come in nice,soft collapsible containers and are extremely handy when camping and access to water is not usually immediate.

3.    Sharp Knives and a good set of utensils

Having spent a frustrating weekend in a cottage with a knife that couldn’t pierce a tomato, I now take a sharp knife on every vacation I go on! For camping I take 2 kinds: A Bread Knife (you can use this baby for anything really – it’s effectively a long, hefty knife at the end of the day) A Paring Knife (wicked sharp, this thing should be able to pierce and slice it’s way through anything you put in it’s path)

Super useful is a set of folding utensils – I have the MSR / Cascade Designs set and I love them! I’ve had mine for at least 11 years and they’re still going strong – the new version looks slightly different but they function the same: Spoon (also a ladle), spatula and strainer. Easy to clean and the fact that they fold makes them easier to store with your other camping supplies

Also in this category should be mentioned…a bottle opener (vital when you realise that the bottle of wine you bought isn’t a screwtop after all and that craft beer…well, it’s not a twisty!) can opener, and tongs (essential for barbeques, salad serving and everything in between!

Alpine_Utensil_Set

Cascade Designs Utensil set

IMG_20140823_184133


4.    Headlamp

A good flashlight is obvious, but personally I don’t like the big LED lamps that are popular – they’re too bright and detract from the fire, plus you have to lug them around, leaving someone in the dark. I usually put a small lantern outside the camper – just so that I can find my toothbrush! – but other than that, I use a headlamp. You can get some really fancy (and, to be honest, rather geeky) looking ones but I’ve had a Petzl Tikka for about 12 years now and it’s a great little camping light. Once on your head you can walk around the campground doing all the things you normally need to do before going to bed (!) and see exactly what you’re doing without everyone else seeing you or fooling the wildlife into thinking it’s daytime

.5034-953_TRQ00_view1_390x390

There are a list of things that should go with you if you’re in a tent and a list for westies and undoubtedly, a list for RVs… Making a list and providing you keep it somewhere you won’t forget, is a very useful and terribly organised thing to do. Having forgotten pillows before and actually, the cooler once (that was actually my husband but, who’s counting..?!) I find that having a list saves you from those “AAAAGH!” moments and will assuredly make your life easier!

205

More smiling, less “AAAGH!” when you get some decent supplies organised!


Okanagan Bound!

download

Tomorrow we set off for the BC Interior! 8 nights, 3 provincial parks (Paul Lake, Fintry and Otter Lake) and 30c weather has been forecasted!

As much fun as it is to go, there are a few challenges involved when it comes to camping for a whole week or more:

1. Food (Keeping things fresh, cold and having enough!) Staying healthy and feeling good are essential.

2. Clothes (The need to wash – especially the kids’ stuff and trying to cover off weather eventualities!)

3. Getting enough sleep (you need patience at all times as a mama, camping you need even more so sleep is essential!)


Being a campermama for a few years now, I’ve learned a thing or two that I’d like to share so that you can meet these challenges with gold stars!

1. FoodIMG_20140822_141415IMG_20140822_140930

Plan, Plan and oh, did I mention planning? Use containers to put portions in so that you don’t take too many jars and bottles that take up more room than they need to. Make things like pancake mix ahead of time. Think about meals you eat at home that could become camping meals with a little adjustment. Get a good cooler – the stainless steel ones really do work, keeping a block of ice for 3 days even in high heat. I always take a Camping Basghetti (see previous blog for recipe) a heat and serve sauce that has the added benefit of being an extra ice pack in your cooler for a day or 3! Here are some other ideas:

  1. Chicken curry and rice (you can buy some great jarred curries at large supermarkets – try President Choice’s Mango Coconut Curry or Pataks Tikka Masala) Measure and bag your rice at home for ease. Take frozen chicken breasts from home or pick some up while you’re out – you can always buy chicken! Throw in some red peppers, tinned peas, onions or whatever else you fancy and voila! You’re laughing! Warning – rice can be a bugger to wash off your pans but the trick is to take a sieve big enough to rest on your pan. Boil the rice for 10 minutes, then drain into the sieve, add about an inch of water to the pan and put the sieve on top with the lid on – let it steam for 10 mins and then take it off the heat – it will sit quite happily until you’re ready for it – perfectly fluffy and fabulous.IMG_20140822_142324
  2. Souvlaki, salad and potatoes. Personally, I like Presidents Choice Souvlaki marinade – it tastes authentic and it’s a 3 portion jar. You can either take along your chicken marinading away in zip lock ready to be scewered and BBQ’d or you can take the bag, marinade and buy some chicken while out – preferably when you pick up the bag of salad! The potatoes you can cook by chopping into 1″ cubes and boiling for about 6-8 minutes, drain and then fry in some olive oil, salt and pepper until crispy – yummy is not even close!
  3. Burgers. This one is easy but to make them amazing – cook them on a charcoal BBQ. We bought ours about 3 years ago from Canadian Tire for about $20 – it’s incredible and still going strong! Serve with salad and Tortilla chips
  4. Pasta, Peas and Sausages. Take the sausages along frozen, a jar of your favourite pasta sauce (I have recently discovered one from President’s Choice which is a creamy tomato sauce in just the right size jar to serve 4 without having to throw any away! Cook the pasta, throw the peas in just before draining (use tinned or even frozen – bag up a portion before you leave home) add sauce and fry up or grill the bangers (translation: Sausages!) This is one of the kids favourites!IMG_20140819_174126
  5. Quesadillas. Tortillas keep very well. A can of refried beans, some cheese, red peppers, onions and maybe some meat if so inclined, more veggies if you’re not – we actually like egg in ours – a kind of omelette quesadilla if you will! As long as you’ve got some salsa, you’re good to go!

2, Clothes

  • Short of buying ‘The Scrubba‘ (see previous blog) it will be washing things through in the sink (if there is one) your washing up bowl if not, hoping the weather is warm enough to dry it and that it’s not so badly stained that throwing it out hasn’t already crossed your mind! Tip here is to take some washing detergent (liquid is best) and a good length of cord or rope to construct a clothes line (don’t forget to pack a few pegs!)
    img 20140806 135247

    img 20140806 135247

  • Packing smart is key. Think layers that can be worn together – in mutliple ways and try and styick to one main colour scheme so that all your clothes would work together. If you can’t be without colour, try and pick one that goes easily with your main scheme. (Mine is olive green, cream and light grey – along with this I can throw on a black, blushy / nude pink or coral or light turquoise top and it all works no matter how I do it. You’ll need a break from those colours when you get home but it won’t be a permanent break up!0aface8e9772d7851c42ad680c6b0861
  • Take a good warm, cozy layer that’s good for early mornings and campfire evenings. A rain coat – these are amazing at blocking out a chill breeze as well as keeping you dry in a downpour. Long pants are essential to have too – even the hottest day can turn chill when the sun sets!

3. Getting enough Sleepf27d4e2d84aa1019f9ca8fb78a556e6b

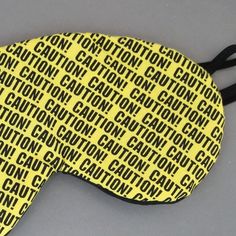
  • Earplugs and an eye mask is all I can say. You can’t go wrong and will sleep much better without hearing the owls hooting or your neighbours recounting their trip to Florida at 2 in the morning! This goes for kids as well! Make sure they have a clock nearby so that they know that, even though it’s light outside, it’s not time to get up!
  • The other is obvious – don’t go to bed too late!

Camping ‘Basghetti’ Recipe

    IMG_20140819_181821Also known as ‘Spag Bog’ in my house, perhaps more traditionally known as Spaghetti bolognese – this is a great camping meal! I make a double batch then freeze it – taking a container of frozen sauce acts rather wonderfully as an ice pack in the cooler and it’s usually a day 3, or even 4, meal. Kid approved, my version uses soya mince rather than beef or other meat, which reduces the fat and also makes it less worrying to keep whilst camping.

To make Camping ‘Basghetti’ (this comes from my daughter, Evelyn, not being able to say Spaghetti for the longest time – also the chef’s name in Curious George so the 2 things merged in her mind!)

You will need:

A couple of decent size cooking onions

1 – 2 red pepper

3 – 4 garlic cloves

6 – 8 mushrooms

1 – 2 Carrots

– I use the food chopper attachment that came with my hand blender but basically you want them chopped up pretty tiny. In a large pan, glug a generous amount of olive oil and lightly saute them all together for a few minutes. Add salt and pepper. Herbs like basil, oregano, Trader Joe’s 21 Seasoning Salute (which is AWESOME) to taste.

Then add:

1 packet of Yves (or similar) vegetarian soya ground round

IMG_20140819_171705IMG_20140819_171537 

Break up the mince into the veg and then add a jar of decent pasta sauce (something meatless) I like President Choice’s Tomato and Basil but this one is totally up to you!

IMG_20140819_171949

Mix everything well, then add some tomato paste – I usually use most of a can but I like it rich – this is up to your own taste – a good glug of red wine vinegar and a dash of worcestershire sauce – again – all to taste.

Throw in some bay leaves (3 – 4) Mix it all up and let it simmer for about 30 minutes or so (I usually forget about it and so it cooks longer – as long as it’s on low it’s good!)

Personally I like a couple of tsps of pesto in it but my family like it as is. 

When camping, using spaghetti would be asking for trouble (!!) so I use fusilli or a good sauce holder instead.  Once your ice pack sauce container has defrosted, just heat the contents, cook some pasta and serve- it tastes great, and when eaten out of a bowl, preferably with grated cheddar on top, it becomes the comfort food you’ve been craving without much washing up or prep involved! (And we’ve all got to love that!)